Invoicing Job Aid
Creating New Invoices
|
Step |
Action |
|---|---|
|
1 |
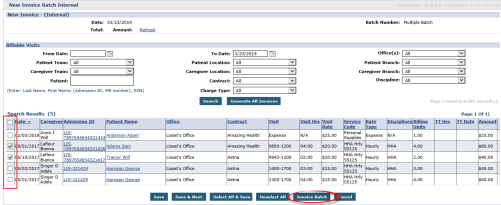
Navigate to Billing > New Invoice – (Internal) and search for visit(s). |
|
2 |
From the search results, select the applicable visit(s). Click on the Invoice Batch button (at the bottom) to generate a new Invoice.
|
|
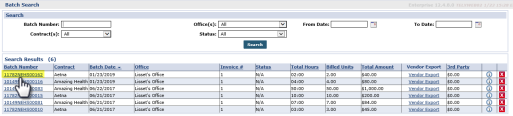
3 |
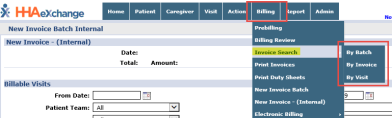
Search for the Invoice to verify the newly created Batch (by Batch, By Invoice, or By Visit).
|
|
4 |
Depending on the chosen search method, click on the Batch Number link or Invoice No. link to view the details.
|
|
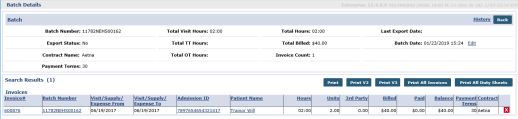
5 |
The Batch Details page opens to review.
|
Review Claims Held on Billing Review
|
Step |
Action |
|---|---|
|
1 |
Navigate to Billing > Billing Review. |
|
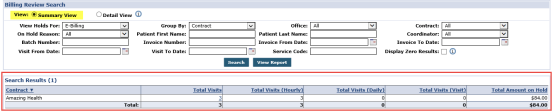
2 |
Select either Summary View or Detail View and E-Billing in the View Holds For field. Select Search.
|
|
3 |
If Summary View is selected, only high-level information is displayed (as illustrated in the image below).
|
|
4 |
If Detail View is selected, specific information is provided to include the On Hold Reasons.
|

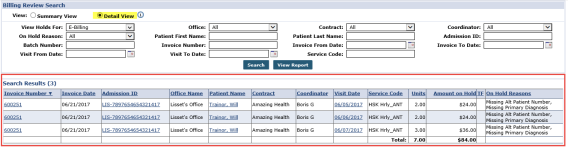
On Hold Reasons
On Hold Reasons are issues keeping the Claim from being submitted. The system holds these Claims because there is missing or incorrect information causing issues after the claim has been exported to a 3rd Party for review.
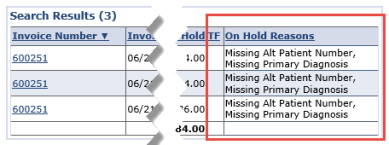
On Hold Reasons may vary from Contract to Contract, as each may have different export criteria. Both e- claims and Paper invoices may be held on this page if the required export criteria is not met.
Submitting New Claim(s) via E-Billing
|
Step |
Action |
|---|---|
|
1 |
Navigate to Billing > Electronic Billing > New Batch > New Claims. |
|
2 |
From the Original Claim E Submission Batch window select a Contract. The system automatically generates a Batch Number upon selecting the Contract. Click on the Add Claims button.
Note: It is not recommended to select the Quick Export checkbox. Using this function does not display the items that are on hold. |
|
3 |
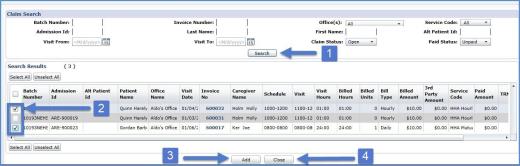
On the Claim Search window click the Search button to pull up billed claims. Select the Claim(s) to add to the batch. Click on the Add button followed by the Close button when finished with adding claims.
Note: Line items displayed in grey are locked due to one or more On Hold Reasons. Hover over the locked claim to view the On Hold Reason or navigate to Billing > Billing Review to review all claims held by the system. |
|
4 |
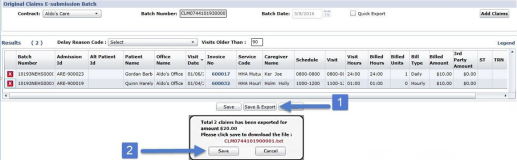
Back on the Original Claims E-Submission Batch window, click on the Save and Export button. A popup opens displaying the total number of claims within the batch as well as the dollar amount. Click Save to save the file to a specific location on your computer.
|