Setting Billing Dx Codes Job Aid
The Diagnosis (Dx) Codes are “split” into Billing Dx Codes and Clinical Dx Codes.
|
Billing Dx Codes |
Assigned by the HHAeXchange System at the time of Invoice Generation, if the contract has been configured to require a Primary Dx code for billing. |
|
Clinical Dx Codes |
Codes entered on the Patient Clinical Info page, which appear on MD Orders. |
Billing Dx Codes must be entered into the HHAeXchange (HHAX) system prior to generating an invoice; this allows for the system to assign a Billing Dx Code at the time of Invoice generation. The Billing Dx Code can be set in the sections highlighted below, with the system determining which Dx code to assign for billing based on the priority level.
|
Priority |
Page |
Description |
|---|---|---|
|
Highest |
Patient Authorization |
If provided, then the system uses the Billing Diagnosis Code(s) set on the Patient’s Authorization Page for billing purposes. |
|
Secondary |
Patient Contract |
If no Dx code is set on the Patient’s Authorization page, the system searches for a Patient Diagnosis Code Override on the Patient’s Contract page. |
|
Default |
Agency Contract Level |
If no Dx codes are set at the Patient level (Patient Authorization page or Patient Contract page), then the system defaults to values set at the Agency Contract level (Default Billing DX Code). |
The following sections provide step-by-step instructions on how to set the Billing Dx Code in each area of the HHAeXchange system (as described above).
Note: If the Billing Dx Code is not set before generating an invoice, or is changed after invoice generation, then the Invoice is held in Billing Review with a Missing Primary Diagnosis Code exception. In this case, the invoice must be deleted and re-generated after the Billing Dx Code is entered.
Refer to the Resolving Missing Primary Dx Code Exceptions Job Aid for further details.
Agency Contract Level – Billing Dx Code Setup
Agencies may set a Contract-Level billing Dx code using the Default Billing Dx Code(s) field. The system assigns the default code provided on this page, unless a Dx Code is set at the Patient Level (refer to the Patient Level Dx Code Setup section). Complete the following steps to set an Agency Contract level Dx Code.
|
Step |
Action |
|---|---|
|
1 |
Navigate to Admin > Contract Setup > Search Contract and select the applicable Contract. |
|
2 |
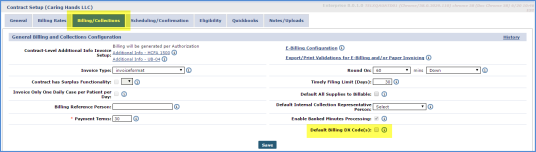
Click on the Billing/Collections tab. Select the Default Billing DX Code(s) checkbox.
Default Billing DX Code(s) Checkbox |
|
3 |
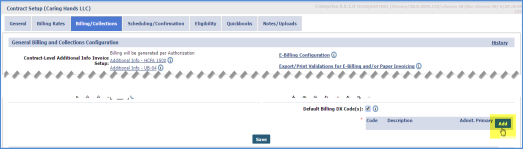
Once selected, a Diagnosis Code table opens. Click Add to apply a default Dx Billing Code.
Add Diagnosis Code |
|
4 |
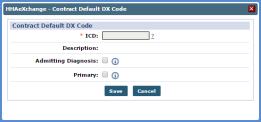
On the Contract Default DX Code window, select the “?” link to the right of the ICD field to search for and select the ICD 10 code to apply.
Contract Default DX Code Window |
|
5 |
Use the Diagnosis Search window to search for and select ICD 10 Codes. To add an ICD Code, select the respective link from the highlighted column (as illustrated in the following image).
Diagnosis Search Window |
|
6 |
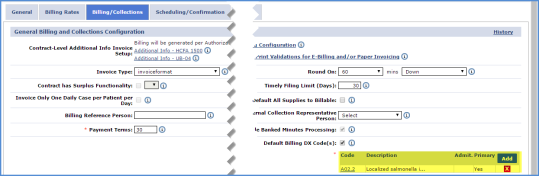
Once selected, the Dx Code populates (as illustrated in the image below).
Diagnosis Code Entered Note: By default, the system assigns the first Dx Code entered here as the “Primary” code. Users may manually designate the “Primary” or “Admitting Diagnosis” code on the Contract Default Dx Code window. |

Patient’s Authorization Level – Billing Dx Code Setup
Agencies may set a Patient’s Authorization-Level Dx code using the Billing Diagnosis Code(s) field on the Patient’s Authorization page to associate Dx Codes directly to Authorizations.
Dx Codes entered on Patient’s Authorization page receive the highest priority. This means that the system assigns the Dx code on this page for billing purposes even if the Patient has one set on the Patient’s Contract page (Patient Diagnosis Code Override) or at the Agency Contract level (Default Billing DX Code).
When adding a new Authorization, the Billing Diagnosis Code(s) field is available once a Contract is selected. Complete the following steps to apply a Dx Code in the Patient’s Authorization page.
|
Step |
Action |
|---|---|
|
1 |
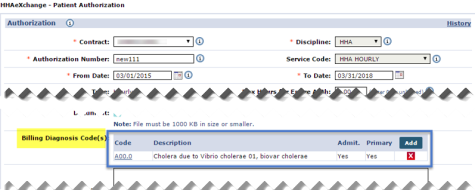
Navigate to the Patient > Authorization to access the Billing Diagnosis Code(s) field.
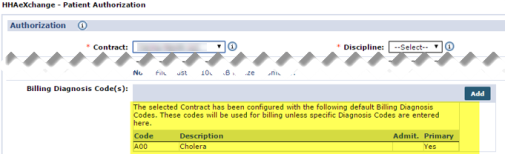
Patient Authorization – Billing Diagnosis Code(s) Field Note: Dx codes already associated to the Patient from the Agency Contract or on the Patient’s Contract page are displayed in the Billing Diagnosis Code(s) field with respective note.
Existing Billing Diagnosis Code The information for Billing Dx Codes already associated to the Patient from the Agency Contract or the Patient’s Contract page is for reference purposes only. These Codes cannot be edited or deleted from the Patient’s Authorization page. If a new Billing Diagnosis Code is entered, then the notes and Codes are removed. |
|
2 |
Click the Add button to apply a new Billing Diagnosis Code. This remove any existing Dx Codes (as noted above). |
|
3 |
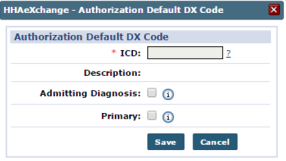
On the Authorization Default DX Code window, select the “?” link to the right of the ICD field.
Note: By default, the system assigns the first Dx Code entered here as the Primary code. From here, Dx Codes can be assigned as the Primary or Admitting Diagnosis Code.
Authorization Default Dx Code Window |
|
4 |
On the Diagnosis Search window search for and select ICD 10 Codes. To add an ICD Code, click on the appropriate Code link (as highlighted on the image below).
Diagnosis Search Window |

Patient’s Contract Level – Billing Dx Code Setup
Agencies can set a Dx Code from the Patient Contract using the Patient Diagnosis Code Override field to associate Dx Codes directly to Authorizations.
Dx Codes entered on Patient’s Contract page are of secondary priority. In this case, the system assigns the Billing Diagnosis Code(s) set on the Patient’s Authorization page for billing purposes (if provided). However, the Dx Codes entered on the Patient’s Contract page are assigned prior to any default values set at the Agency Contract Level.
Complete the steps below to set a Dx Code from the Patient Contract page.
|
Step |
Action |
|---|---|
|
1 |
Navigate to the Patient > Contract > Additional Options and select Patient Diagnosis Code Override from the dropdown.
Patient Diagnosis Code Override |
|
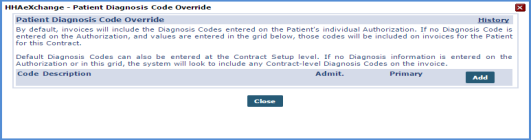
2 |
The Patient Diagnosis Code Override window opens. Click the Add button to apply an ICD code. The note displayed details how the system determines which Diagnosis Code to apply to an invoice.
Patient Diagnosis Code Override Window |
|
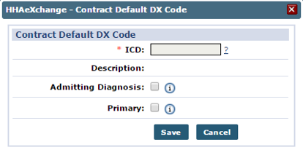
3 |
On the Contract Default DX Code window, select the “?” link to the right of the ICD field.
Contract Default Dx Code Window |
|
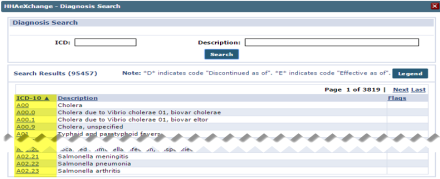
4 |
On the Diagnosis Search window search for and select ICD 10 Codes. To add an ICD Code, click on the appropriate Code link (as highlighted on the image below).
Diagnosis Search Window |
|
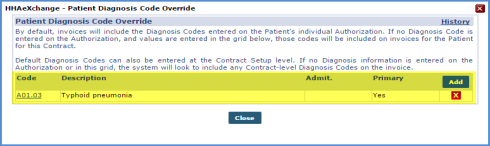
5 |
The selected code appears.
Diagnosis Code Entered |