Release Notes 24.03.01
These release notes contain a high-level overview of updates and new functionality introduced to the HHAeXchange Enterprise software. As HHAeXchange is permission-based, not all functionality is available for every role within an Agency. Further inquiry concerning the contents of this document should be directed to HHAeXchange Client Support.
Release Notes Summary
To view a history of Release Notes, refer to the Release Notes Summary providing an overview of archived releases.
In This Release...
Adjust All Claims Added to Bulk Claims Resubmission
Dashboard Custom Views and Added Features
Adjust All Claims Option Added to Bulk Claims Resubmission
An Adjust All Claims button has been added to the Add Original Claims E-Submission Batch page (pictured below) to facilitate bulk claims adjustments. Functionality remains the same whether submitting original claims or adjusting claims.
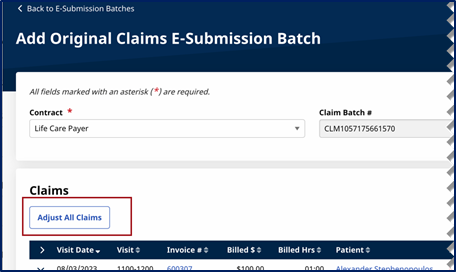
Claims Resubmission – Adjust All Claims Button
Clicking on the Adjust All Claims button opens the Adjust All Claims window (shown below) to select the Submission Type (Original, Adjustment, or Void). Depending on the selected Submission Type, applicable fields appear to complete (specifically, when Adjustment or Void are selected).
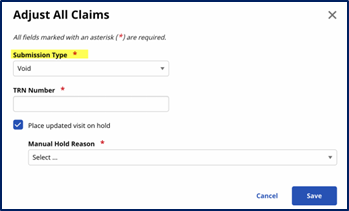
Adjust All Claims Window
In addition, an Apply adjustment to all added claims within same invoice checkbox field has been added to the Claim Adjustment window (when adjusting a specific claim) replacing the former Update dropdown field.
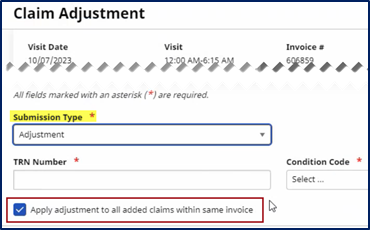
Claim Adjustment Window – Apply Adjustment to All Claims Checkbox
Dashboard Custom Views and Added Features
Custom Views
BI Dashboards have been enhanced to enable users to create and save custom views, based on selected filters. With custom views, users can access their saved set of filters to access specific information on dashboards without having to reselect filters each time.
Users can create multiple custom views and set one as default to always open to the selected custom view. The system defaults to Original View to show all details for all dashboards. Click the View tab to open the Custom Views window to toggle between views, as needed.
Create a Custom View
Complete the following steps to create a custom view on any dashboard.
-
Select the desired filters and click Apply.
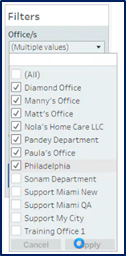
Select Filters
-
Click the View tab at the top bar.

View Original - Tab
-
The Custom Views window opens. Enter a title for the custom view in the Name this view field. To make this a default view, select the Make it my default checkbox and click Save.
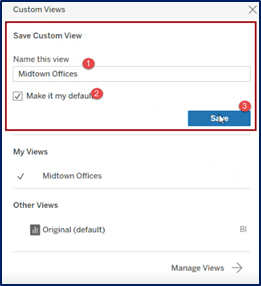
Custom Views Window – Create a Custom View
Once created and made default, the Custom View replaces the Original View on the view tab, as shown below. To toggle between Original and other saved custom views, click on the tab to open the Custom Views window and select other views from the My Views section.

Custom View as Default
Manage a Custom View
Custom views can be edited, renamed, or deleted from the saved views. To manage a custom view:
-
Select the View tab at the top.
-
The Custom Views window opens. On the My Views section, select the applicable custom view (if multiple have been created).
-
At the bottom of the window, click the Manage Views button (as shown below).
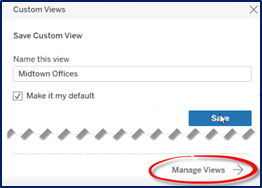
Manage Views Button
-
A set of icons appear under the My Views section of the window (as shown).
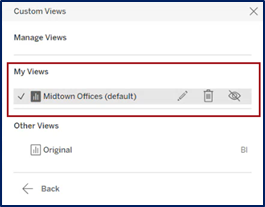
Manage View Options
-
Click the pencil icon to edit or rename the custom view; or
-
Click the trash bin icon to delete the custom view. A confirmation window opens when deleting a custom view. Click Delete as prompted to remove the view.
-
Click Back to return to the dashboard.
Added Functionality
The Download and Full Screen View options have been added to all dashboards.

Added Features
Download
To download dashboard information, click the download icon and select the desired output (such as PDF or PowerPoint).
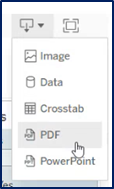
Download Output Options
Follow the system prompts to download the file to your workstation. In the following example, an image has been created as an output file.
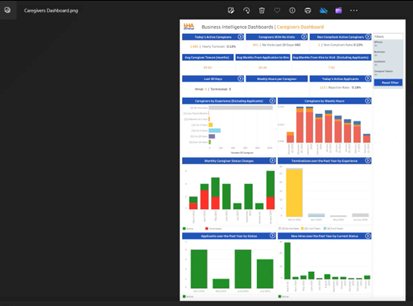
Downloaded PDF
Full Screen
Click the Full Screen icon to expand the dashboard on the screen to full capacity.
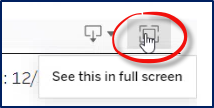
Full Screen Option
To exit Full Screen, click the Esc key or click the Full Screen icon to return to standard view.

Return to Standard Screen