Unbilling
A visit can be un-billed if an error is discovered after it has been exported in a claim. Because these mistakes are typically clerical, they may not be detected by any of the system’s Exceptions pages. Once the error has been corrected, the visit can be re-billed. If applicable, one can “un-bill” a single visit or all the visits within an invoice, or all visits within a batch. Complete the following steps to “un-bill” a visit.
|
Step |
Action |
||||||||
|---|---|---|---|---|---|---|---|---|---|
|
1 |
Navigate to Billing > Invoice Search. |
||||||||
|
2 |
Locate the Visit/Invoice/Batch to un-bill. |
||||||||
|
3 |
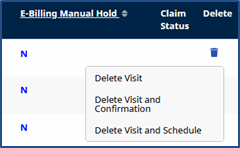
From the Search Results page or Batch/Invoice Details page, click on the delete icon (
Un-Billing Options
|
||||||||
|
4 |
The user is prompted to enter a Reason and Note explaining the deletion. Click Delete to finalize. Schedule and Confirmation details for any un-billed visits become available to edit. | ||||||||
|
5 |
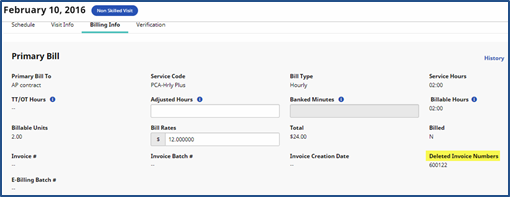
Once corrections have been applied to the visit(s), it can be re-billed (refer to instructions in the Rebilling - Resubmission and Adjustments topic). The new invoice details and the Deleted Invoice Number display on the visit’s Billing Info tab.
Invoice Details on the Billing Info Tab Note: If a user invoices, runs payroll, and then un-bills and edits visit details, then a Payroll Adjustment is generated, which is applied during the next Payroll Batch. Refer to the Payroll category to apply an un-billed visit to a new payroll batch. |

