Create a New Claims Batch
The next step is to generate a New Claims Batch. Complete the following steps to create a New Claims Batch.
|
Step |
Action |
|---|---|
|
1 |
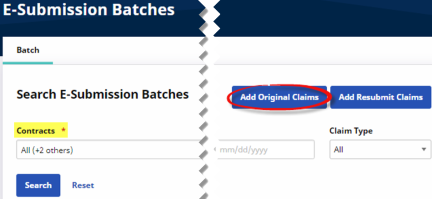
Navigate to Billing > Electronic Billing > E-Submission Batches to generate a New Batch Claim. |
|
2 |
On the E-Submission Batches page, click on the Add Original Claims button.
Add Original Claims |
|
3 |
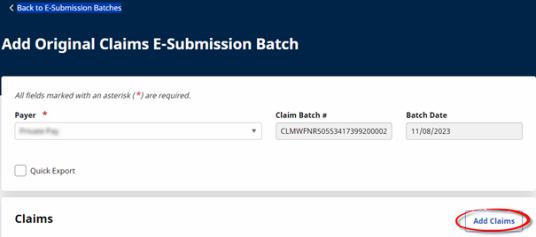
On the Add Original Claims E-Submission Batch page, select the Contract. The Batch Number and Batch Date will populate. Click on the Add Claims button.
Add Claims |
|
4 |
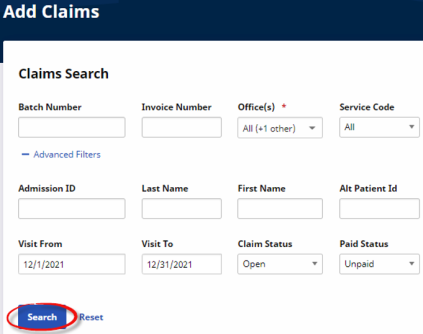
On the Add Claims, Claims Search page, use the search filter fields or click on the Search button to find claims.
Claims Search |
| 5 |
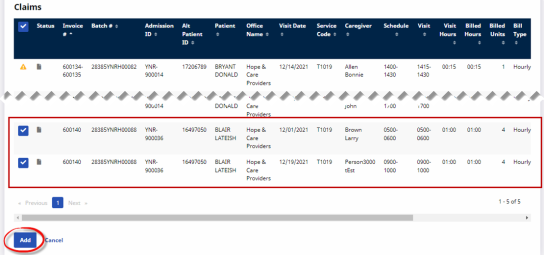
On the Search Results in the Claims section, select the claims to be added and click the Add button at the bottom of the page.
Claims Search: Select Claim(s) Note: Visits with a yellow warning icon (with no active checkbox) are held in Billing Review with an On Hold Status and must be resolved prior to billing. Hover over the icon for a pop-up indicating the hold reasons. |
| 6 |
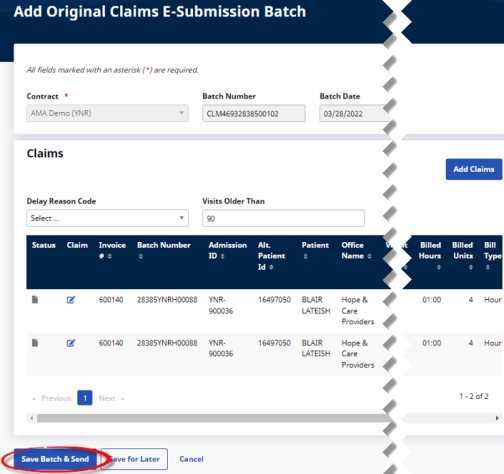
The claims appear on the Add Original Claims E-submission Batch page. Click on the Save Batch & Send button to send the claims to the SFTP (Secure File Transfer Protocol) to be picked up by the Payer system via the overnight process.
Claims E-Submission: Save Batch & Send Note: Using the Save for Later button only creates the claims batch but does not send to the SFTP. Refer to Reviewing a Claims Batch for further instructions. |
| 7 |
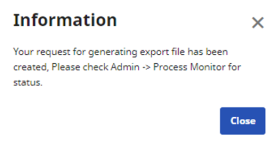
The system alerts that the export file is generating. Click Close to continue.
Information Window |
| 8 |
(Optional) Navigate to Admin >Process Monitor to view the progress of the submission. Expand the All Sections category to view. The file can either be in Pending or Completed status.
Process Monitor: All Sections |
