Multi-Factor Authentication
|
DISCLAIMER |
|
This feature is enabled by HHAX System Administration. Contact the HHAX Support Team for assistance. |
Tip: You can press Ctrl-F on your keyboard to search this topic.
Multi-Factor Authentication (MFA) is an additional user security method that can be required at the Payer level and at the Provider Office level. When MFA is required, users must enter their Username, Password, and a unique system-generated code provided at a secure location (such as the verified mobile phone or email address on file).
When an MFA user logs into the system with their Username and Password, a six-digit system-generated code is sent to the user’s designated secure location (email address or mobile phone).
MFA users are asked to verify their identity using a unique MFA code every 30 days. When the code is sent, the user has 30 minutes to submit the code on the Multi-Factor Authentication page to be allowed access to the HHAX system.
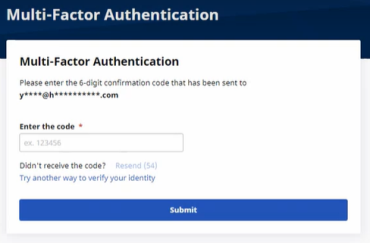
MFA Request Page
User Setup of MFA
When MFA setup is complete, the system displays a Setup Request page the first time you enter your Username and Password. Click Set Up Now to continue.
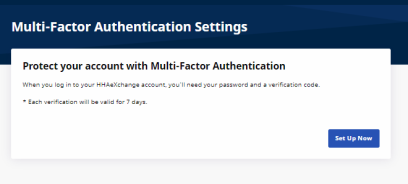
MFA Setup Request page
Select the method to verify your identity: Text or Email, as seen in the following image.
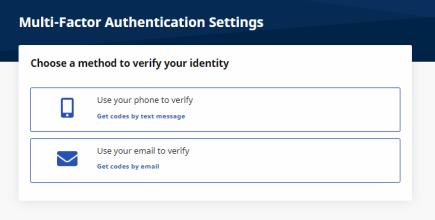
Choose a Verification Method
If you select Use your email to verify, the system sends a unique six-digit code to the email address on your HHAX user profile. This code is valid for 30 minutes from the time of issue. If you need a new code, click Resend to receive a new code after 60 seconds.
Enter the 6-digit code on the Let’s set up your email page, and click Confirm to log in and access the HHAX system home page.
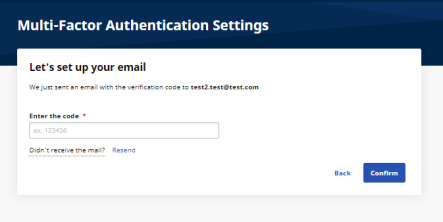
Email Setup
Note: Reauthentication is required every 30 days as well as when the browser is changed or the cache is cleared.
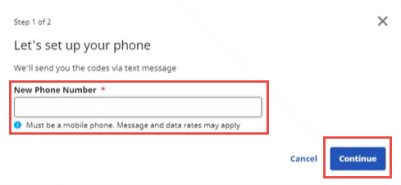
If you select Use your phone to verify, the system displays the Let’s set up your phone page. Enter your mobile phone number with area code in Phone Number and click Get code.
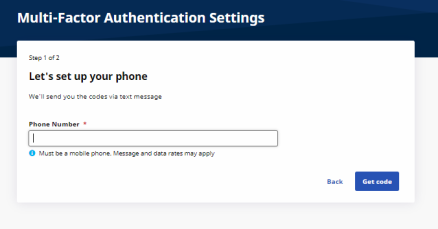
Phone Number Setup – Step 1
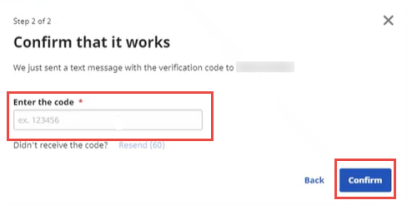
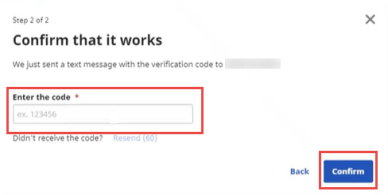
The system sends a unique six-digit code to the mobile phone number you entered. This code is valid for 30 minutes from the time of issue. On the Confirm that it works page, enter the six-digit code, and click Confirm to log in and access the HHAX system home page.
If you need a new code, click Resend to receive a new code after 60 seconds.
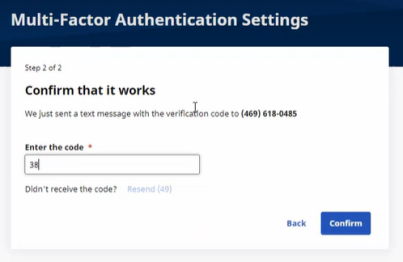
Phone Number Setup – Step 2
Note: Reauthentication is required every 30 days.
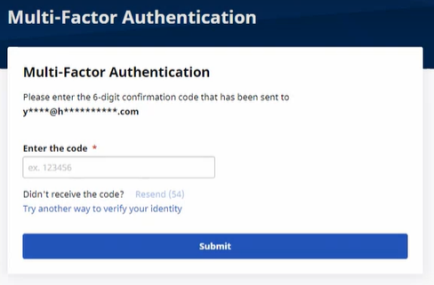
MFA Request Page
Change User MFA Settings
MFA users can view and change their own MFA settings in the Enterprise Portal.
To change MFA settings, from the User Profile menu at top right, select Multi-Factor Authentication. This option is only available to MFA users.
Note: Users cannot disable MFA or change the email address on the MFA Settings page. When the email address is changed in the HHAX User Profile, the system prompts the user to set up MFA again on their next login.
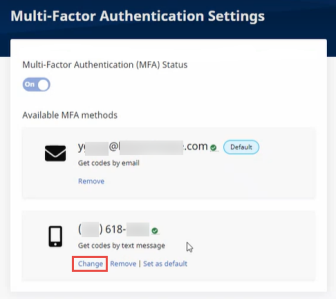
The Multi-Factor Authentication Setting page opens, as seen in the following image. Changes can be made to the MFA Settings, as explained in the instructions under the image.
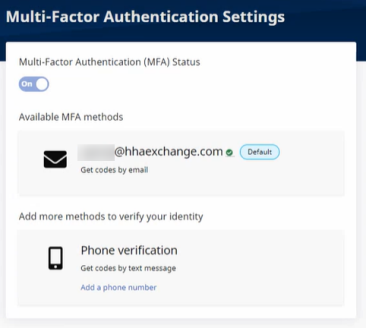
MFA Settings Page
Add a Mobile Phone Number
When a mobile phone number has not been designated, complete the following steps to add a mobile phone number.
Note: You can add only one mobile phone number per user.
|
Step |
Action |
|---|---|
|
1 |
Click Add a phone number in the mobile phone section of Available MFA methods. |
|
2 |
Enter the phone number (including the area code) in New Phone Number. Click Continue.
Phone Number Setup – Step 1 |
|
3 |
In Enter the code , type the code sent to the mobile phone, and click Confirm.
Phone Number Setup – Step 2 |
Change a Mobile Phone Number
Complete the steps in the following table to change a mobile phone number.
|
Step |
Action |
|---|---|
|
1 |
On the Multi-Factor Authentication Settings page, click Change In the mobile phone section of Available MFA methods.
MFA Settings Page |
|
2 |
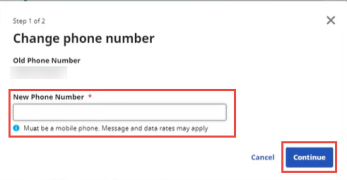
Enter the New Phone Number, and click Continue.
Phone Number Change – Step 1 |
|
3 |
In Enter the code , type the code sent to the mobile phone, and click Confirm
Phone Number Change – Step 2 |
Remove a Mobile Phone Number or Email Address
Complete the steps in the following table to remove a mobile phone number or email address from the available MFA methods.
|
Step |
Action |
|---|---|
|
1 |
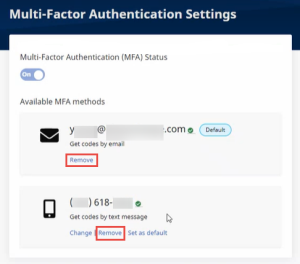
Click Remove from either the email address or mobile phone section of Available MFA methods.
MFA Settings Page Note: Only one method can be removed; either the email or mobile phone, not both. |
|
2 |
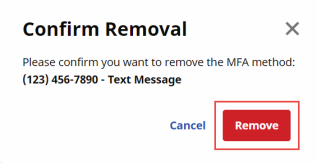
Click Remove when prompted to confirm the removal.
Removal Confirmation |
Change Default MFA Method
Complete the steps in the following table to change the default MFA method.
|
Step |
Action |
|---|---|
|
1 |
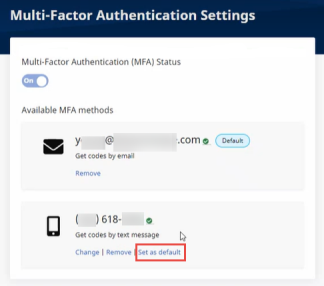
Click Set as default in the email address or mobile phone section of Available MFA methods.
MFA Settings Page |
|
2 |
A banner at the top of the MFA Settings page indicates that the default setting has been changed. |
